There are two ways to add a calendar to your Papyrs intranet site:
Google Calendar integration
The first option is to embed a Google Calendar on your page(s). You can add multiple calendars, either from a personal Google account, or from G Suite (Google Apps), if your organization already uses that. To add a Google Calendar to a page, use the Media/Widget > Google Calendar option.
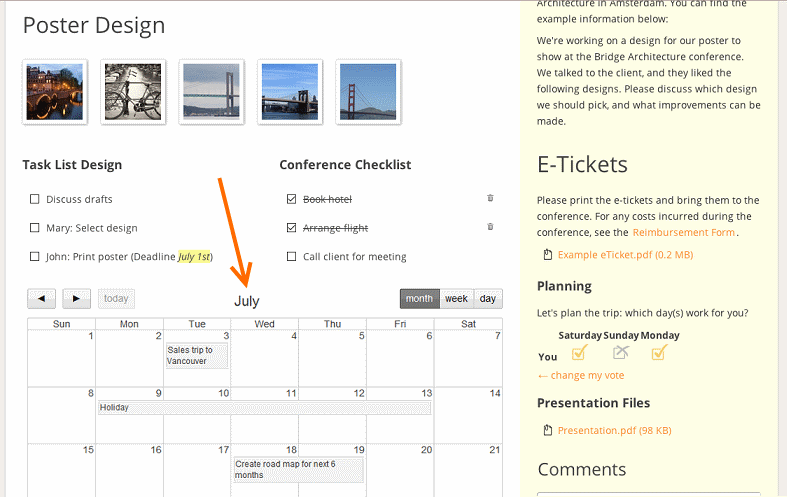
Create your own custom calendar
Another option is to create a custom calendar using Papyrs' forms. The form fields you add can be used to create new items displayed on a calendar. Using the form fields you can add additional information for each calendar item, such as a description, responsible person or related file(s). The fields can also be used to filter and find items on your calendar.
As an example, let's build a calendar form where people submit their out of office status. Let's start with a new empty page and edit it:
Start & End date
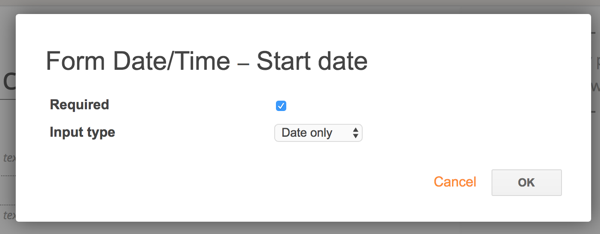
Each item needs a date of course, so we drag a Form Date widget to the page. Let's add one which we label Start date, and add another one which we'll label End date.In this example we only use full days, so we decide to remove the time part. We do this by clicking edit on the date field we've just added, and selecting Date only under Input type. We also make sure the user fills in this field by marking it Required.

Description
Next to the dates, we'd also like people to fill in a description. Let's add a Form Text widget, and label it Description.Additional details
To demonstrate we can add all kinds of additional information, let's add two more fields:- We add a Form Choice field and label it Reason. We want to user to select one of the available options: Holiday, Business Trip, or Other. we can add these options by clicking edit on the Reason field.
- We want users to be able to upload one or more related files, e.g. a brochure about a conference they're visiting in case of a business trip. To do this we add a Form File field.
Permissions
By clicking Edit on the Submit form button, we can change form settings, like who can see the calendar records. For this example we set up the permissions such that everyone can see all calendar items.

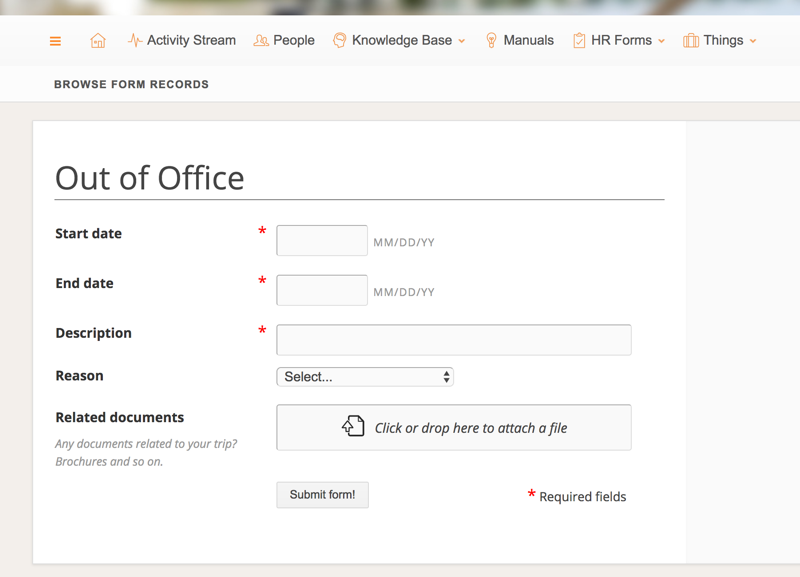
Let's save the page. Our form for creating new Out Of Office calendar records is now ready:
Viewing & Filters
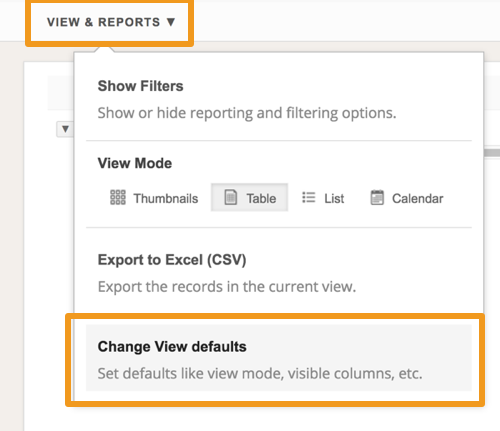
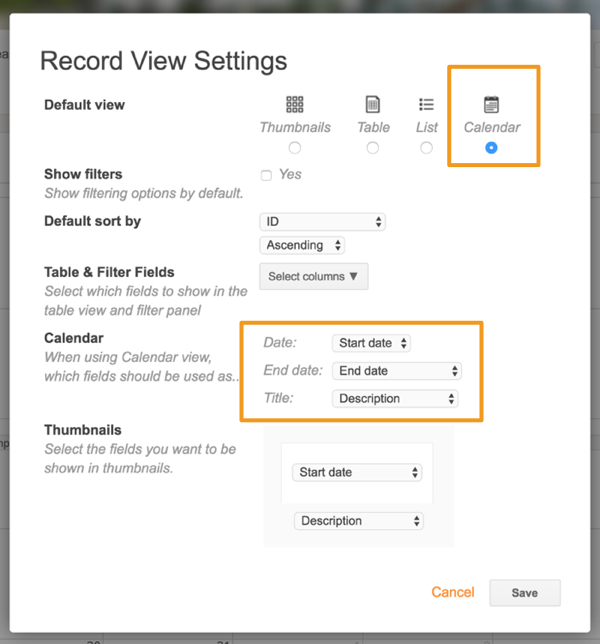
We can view all records people submit by clicking Browse form records. By default, these records are shown as a list, but we want to show them as a calendar items. To do this, we click Browse form records, then select View & Reports, and then Change View defaults:
- Under Default view, we select Calendar.
- Under Calendar, we select the Start date field as Date, and End date field as End date.
- We use the Description field as the Title for items on the calendar.
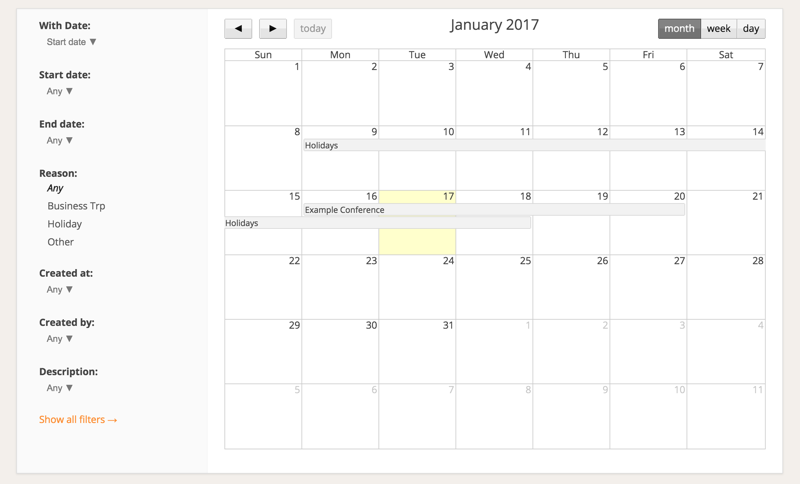
We now have a custom calendar, with custom fields for additional details and filters:
Events app
To get started with a custom calendar, you can install the ready-made Events app.
It's a general version of the custom calendar above, with App mode enabled (meaning each calendar item will get its own page which can be customized further to add more information).
