Global Navigation
Next to adding Navigation Widgets to individual pages, Papyrs also allows you to easily add global navigation links and menus to your intranet. The global navigation is shown in the Menu Bar, just under the header and at the top of the page.
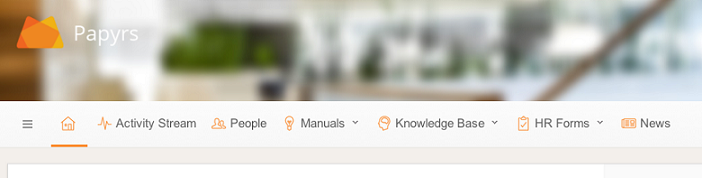
The menu bar can be fully customized to add just the navigation you need. You can add links to frequently used Papyrs features, important pages, folders, favorite pages, interesting external links or add custom dropdown menus with more links. The menu bar is shown on top of every page, and is visible to everyone in the team. Guests users and visitors to public pages will not see the menu bar. Links to pages and folders the current user has no access to are automatically hidden.
By default, icons to access standard Papyrs options (Settings, Activity Stream, and so on) are shown in the menu bar, but they can easily be removed if you don't need them.
The More Menu
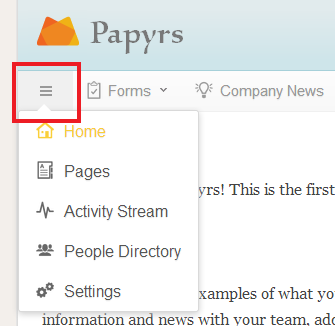
Because the menu bar is fully customizable, you can remove all navigation links to standard Papyrs functionality that you don't need very often. To make sure you'll always be able to access all functionality, the first button in the menu bar is always the More Button,  . Clicking this button will bring up the More Menu, which contains links to standard functionality such as the Settings page, or the Activity Stream. Note that users only see links to options that are available to them. For example, if a user has no permission to access the People Directory, this link won't be shown in the More menu.
Customizing the Menu Bar - Menu Bar Editor
Papyrs comes with a special Menu editor which allows you to easily add navigation links and menus, without requiring any technical knowledge or markup codes. Note that only Administrators in your team can edit the menu bar. To edit the menu bar, open the More Menu (), select Settings, and then Menu.
Once you open the Menu Editor in Site Settings > Menu, you'll see a screen like this:
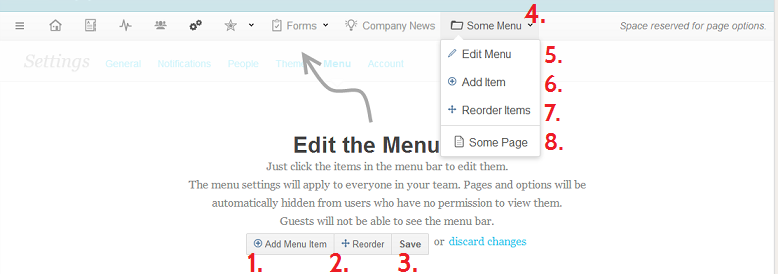
1. Click Add Menu Item to add a new item to the menu bar.

In the next dialog you can select what kind of menu item you want to add. You can add the following items:
- Link (URL) — A link to an (external) website.
- Page Link — A link to a Papyrs page.
- Folder Menu — Add a Folder as a menu to the menu bar. Opening the menu will show all the pages visible to a user in that folder.
- Tag Menu — Add a tag as a menu to the menu bar. Opening the menu will show all the pages visible to a user with tag tag.
- Custom Menu — Add a dropdown menu to the menu bar, to which you can add more Link and Page Link items.
- Default Navigation Links — Add a link to standard Papyrs functionality, like the Activity Stream or the People Directory.
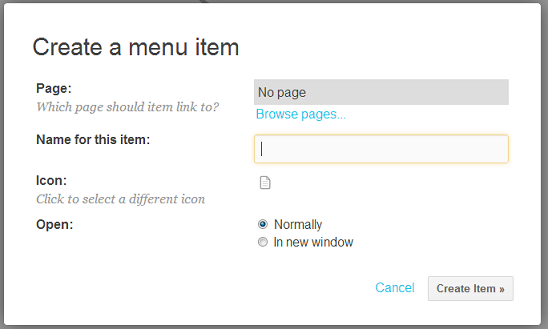
Depending on the type of item you add to the menu bar, you'll get a dialog with options for that item. Below is the dialog for creating (or editing) a Page Link. Each menu item can have a name and/or an icon. Leave the Name for this item field blank if you want to display an icon only. In the case of Folder Menu's and Page Links, you can either use the name of the Page/Folder itself, or set a custom name. If you keep the name of the Page/Folder, the menu item is automatically renamed when you rename the Page or Folder itself.
2. Click the Reorder button to re-order the items on the menu bar.
3. Click Save to apply and save the changes. Everyone in the team will now see the new menu bar settings.
4. To edit or remove an existing menu item on the menu bar, just click on it. An edit dialog will appear.
5. Click Edit Menu to edit the settings (name, icon, and so on) of an existing sub menu on the menu bar.
6. Click Add Item in a sub menu to add a new menu item to the sub menu.
7. Click Reorder Items in a sub menu to reorder the items in that sub menu.
8. To edit or remove an existing menu item in a sub menu, just click on it. An edit dialog will appear.
To change the colors of the menu bar, see Themes & Branding.